
I first spotted these Garlic Bread Rolls on Pinterest one evening while looking for something cozy to bake, and I instantly knew I had to try them. There’s just something magical about warm, buttery bread fresh out of the oven — especially when it’s brushed with garlic and herbs. After testing a few versions, I added my own little twist to make them even softer and more flavorful. The result? Perfectly golden rolls with a tender, pull-apart texture and that irresistible garlic aroma that fills the whole kitchen. These rolls have quickly become a favorite around here — whether I’m serving them with pasta, soup, or just enjoying one on its own with a little extra butter. They’re simple, comforting, and guaranteed to make any meal feel special.
Tips for Making Dinner Rolls
Use a stand mixer: Kneading with a stand mixer saves time and ensures a smooth, elastic dough. Hand-kneading works too but will take a bit longer.
Use a kitchen scale: For perfectly soft rolls, measure your ingredients by weight. Too much flour makes rolls dense.
Don’t rush the rise: Let the dough rise until doubled in size. A slow, warm rise creates the fluffiest texture.
Shape evenly: Make sure all your rolls are the same size for even baking — a kitchen scale helps here too.
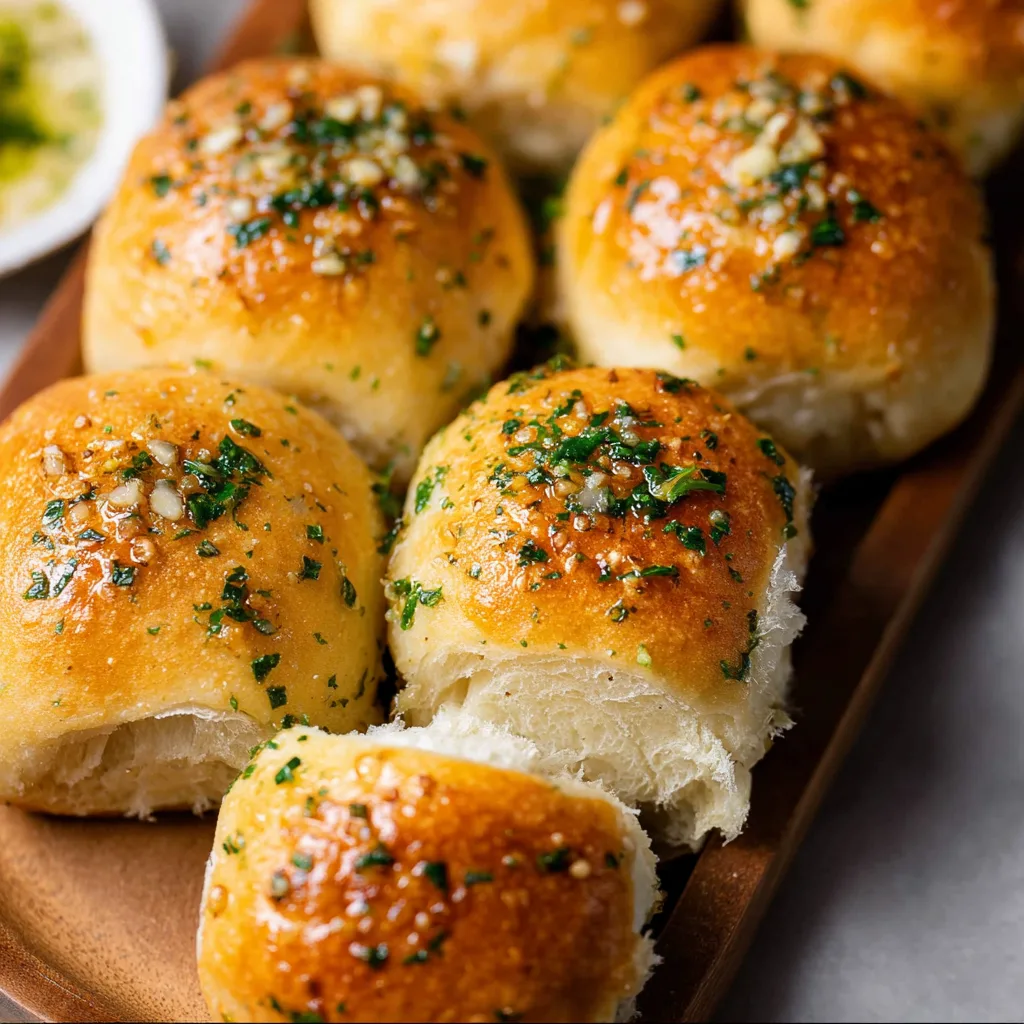
Brush with garlic butter: For that classic garlic bread flavor, brush freshly baked rolls with warm garlic butter before serving.
Ingredient Notes and Substitutions
Instant yeast: Works fast and doesn’t need proofing. If using active dry yeast, activate it in warm milk first until foamy.
Garlic: Use fresh garlic cloves for the boldest flavor. Avoid pre-minced garlic for this recipe.
Parsley: Fresh parsley gives color and flavor, but fresh thyme or oregano work too. Dried parsley can be substituted with about one teaspoon.
Granulated sugar: Adds a hint of sweetness and helps the yeast activate. You can use honey or maple syrup instead.
Milk: Whole or 2% milk gives the best texture and richness.
Butter: Use high-quality butter for flavor — European-style butter like Kerrygold gives the best results.
Recipe Instructions
Step 1: Make the Garlic Butter
In a small saucepan, melt butter over medium heat and stir in minced garlic. Cook until the garlic is fragrant and sizzling, about 1–2 minutes. Set aside to cool slightly.
Step 2: Combine the Dry Ingredients
In a large mixing bowl, combine flour, sugar, yeast, salt, and chopped parsley. Add the cooled garlic butter, warm milk, and egg.
Step 3: Knead the Dough
Using a stand mixer fitted with a dough hook, knead on low speed for 10–12 minutes, until the dough becomes smooth, soft, and slightly tacky. If the dough feels too sticky, add flour one tablespoon at a time until workable.
Step 4: Shape the Rolls
Divide the dough into 12 equal pieces (about 67 grams each). Shape each one into a round ball by cupping your hand around it and rolling in small circles on your counter. Place the shaped dough balls in a buttered 9×13 baking pan.
Step 5: Let the Dough Rise
Cover the pan loosely with plastic wrap or a clean towel. Set in a warm spot and let rise for 1–2 hours, or until doubled in size.
Step 6: Brush and Bake
Preheat the oven to 350°F (180°C). Brush the rolls with a beaten egg wash. Bake for 20–30 minutes until golden brown on top.
Step 7: Finish with Garlic Butter
While still warm, brush rolls generously with garlic butter made from melted butter, minced garlic, and parsley. Sprinkle flaky sea salt on top for a finishing touch. Serve immediately for the best flavor and texture.
Storage, Freezing, Make Ahead, and Reheating
Storage: Keep leftover rolls in an airtight container at room temperature for up to 3 days.
Freezing: Once cooled, freeze rolls in a sealed container or freezer bag for up to 1 month. Thaw before reheating.
Make Ahead: Shape rolls and refrigerate overnight, covered tightly. Let them rise to room temperature before baking.
Reheating: Warm in the oven at 350°F (175°C) for 10–15 minutes, or microwave for 20–30 seconds until soft.
FAQs
Q1: Can I make these garlic rolls without a stand mixer?
A1: Yes! You can knead by hand for about 15 minutes until the dough feels smooth and elastic.
Q2: Can I use dried herbs instead of fresh parsley?
A2: Absolutely. Use one teaspoon of dried parsley or substitute with oregano or Italian seasoning.
Q3: Can I add cheese to the dough?
A3: Yes! Add ½ cup of shredded mozzarella or parmesan to make cheesy garlic rolls.
Q4: How can I make this recipe dairy-free?
A4: Replace butter with vegan butter and use unsweetened almond or oat milk.
Q5: What’s the best way to keep the rolls soft?
A5: Brush with butter immediately after baking and cover with foil or a towel while cooling.
Q6: Can I double the recipe?
A6: Yes, just use a larger pan or bake in two batches. Adjust rising time if needed.
Q7: Why did my rolls turn out dense?
A7: This usually happens from too much flour or not enough rising time. Always measure accurately and let the dough double in size.
Q8: Can I make them pull-apart style?
A8: Definitely. Arrange the dough balls close together in a round or square pan for easy pull-apart garlic rolls.
Q9: Can I add more garlic for stronger flavor?
A9: Of course! Add an extra clove or two to the butter mixture for extra garlicky goodness.
Q10: What dishes pair best with garlic bread rolls?
A10: They’re perfect with pasta, soups, salads, roasted meats, or as sliders for mini sandwiches.
Final Thoughts
Garlic Bread Rolls are one of those recipes that turn a simple meal into something memorable. Soft, golden, and brushed with buttery garlic herb goodness, they’re the kind of bread that disappears the moment it hits the table. Whether you’re serving them alongside pasta, soup, or a big family dinner, these rolls bring warmth, comfort, and that irresistible aroma of homemade bread. Once you make them from scratch, you’ll never want store-bought rolls again — they’re that good.
Garlic Bread Rolls
Ingredients
Equipment
Method
- In a small saucepan, melt butter, stir in minced garlic and cook 1–2 minutes until fragrant. Set aside to cool slightly.
- In a large mixing bowl, combine flour, sugar, yeast, salt, and chopped parsley (or herbs). Add the cooled garlic butter, warm milk, and egg. Mix until dough forms.
- Knead dough until smooth and elastic (about 10–12 min by stand mixer — longer by hand if needed). If dough is too sticky, add flour by tablespoon until workable.
- Divide dough into 12 equal pieces (≈ 67 g each) and shape into balls. Place them in a buttered 9×13‑inch baking pan, spacing evenly.
- Cover loosely and let rise in a warm place until doubled in size (1–2 hours).
- Preheat oven to 350 °F (180 °C). Brush rolls with egg wash. Bake 20–30 min until golden brown on top.
- As soon as rolls are out of the oven, brush generously with garlic butter, and sprinkle flaky sea salt if desired. Serve warm.